Smart Home in 8 KBytes...

Smart Home in 8 KBytes...

Wavin modbus web interface

2026. július 08. - Eaglewing

6 éve nem posztoltam....sok minden történt.

Ennyi idő alatt, bár kész volt, áttértem a arduino alapú smart home-ról főleg Shellyre.

De ami miatt írok - pár napja jött egy email, hogy megszűnik a wavin web alapú irányitás lehetősége. Ez a www.mywavinhome.com. Meglátoom szerint az egész netes kommunikácó IÍT biztonság szempontjából gyenge volt, igy inkább nem engedtem ki a saját egységemet a netre. Viszont jó lett volna irányitani.

6 év alatt többek között megjelent az AI, és annak több változata.

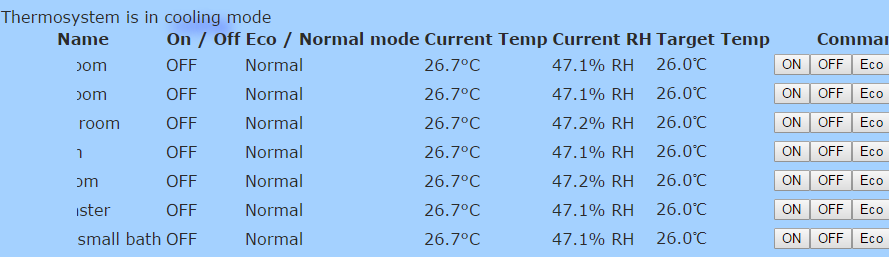
A gyakorlatban a Claude, nyilvános információk alapján elkésztettt egy tökéletes web irányitó interfészt. Amit akár még home assistant-ba is integrálhatsz. 

A gyakorlatban nálam az ESP32 egy modbus modullal csatlakozik a WTC-Net BMS portjára.

( A routerre nincs rákötve IT biztonsági okok miatt. Megjegyzem ha akarod egy LAN kábellel is eléred az eszközt akár, MODBUS over TCP-n át. Részletek később)


Később felrakom a github-ra.

Igy néz ki. ami elkészült.

Részletek később...


Merry Xmas - the house of music with some IoT

Merry Xmas!

...with this video first:


I integrated some Shellies for IoT control in last weeks. Shellys are small, wifi iOT devices based on ESP8266, which can help you to control the lights behind traditional switches, outlets, etc. Very similar to the Sonoff variants, bit it comes from EU (CE certified - important - imagine that you have a fire and your insurance company says you had some doubful chinese devices, so sorry...), and altough it is possible to control over cloud, that can be turned off (privacy matters), it is manageable over plain local LAN or over the popuplar smart home systems too (Domotiz, Home Assistant, and even Google Home etc) using web, MQTT, etc. Read more here about the API.

It looks like so in the wall, nicely hidden behind your original lamps switch:

Shelly 1 WiFi Switch - Bastelgarage Elektronik Online Shop


But how can you access it from your own application?
For example you may turn on/off a device with a simple command like this: 

http://192.168.0.55/relay/0?turn=on

You may ask about the security of this - and the question is very appropiate for every IoT device. These devices can be protected with username/password (and shouldl be!). 

The C# code as a MS Visual project file (it is based on work of Sebastian Leopold, on Instructables idea).


 can be downloaded from here


155 days and is still up....further ideas to implement

that is what I call stability and reliability:)

uptime_155days.JPG


Further ideas to develop/consider

- garage door control
- postbox check and notification
- fence perimeter control and event triggering
- doorbell ring detection and push notification
- water pressure monitoring (garden irrigation checkup)
- controlling (starting) the roomba 
- infrared appliance control (via a slave IR ESP unit)

 and so on...

How to survive the rollover problem - uptime passed 74 days.

Arduino has an internal timing rollover, which can cause bad things...if you are not aware of, read this:

https://playground.arduino.cc/Code/TimingRollover

The internal milli() function rolls over at every ~54 days.

Even better article: learn to live with and how to handle it well.


Well, systems works stable, without any problems:

74days.JPG

As alternative, you may use now() for timing purposes, but use it wisely. Depends what you want for. 


Backup UPS/battery for smart home

The best things are always the most simple things.

I added a UPS solution (as we have quite ofther power outages) to the smart home.

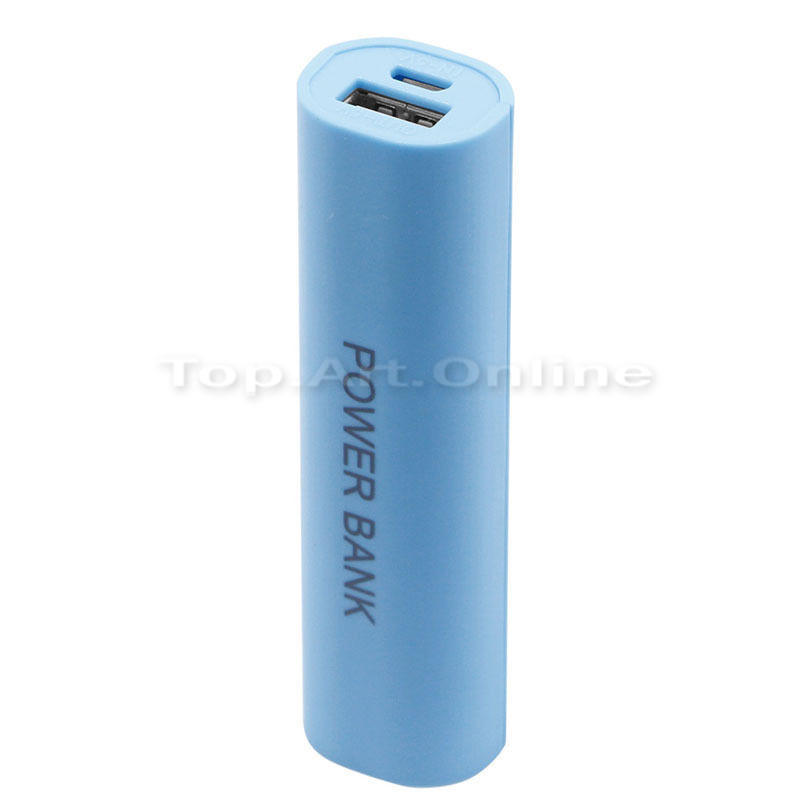
Well, connect a simple USB power bank to the unit (between the USB charger and the arduino unit), and you are done. Simple? Yes it is. Works? Yes, it does. 

I added a small code to detect if the system is running from battery - in that case the backlight of LCDs are cut off as they drain quite much power. 


powerbank.jpg


Controlling Wifi Outlets using ardiuno

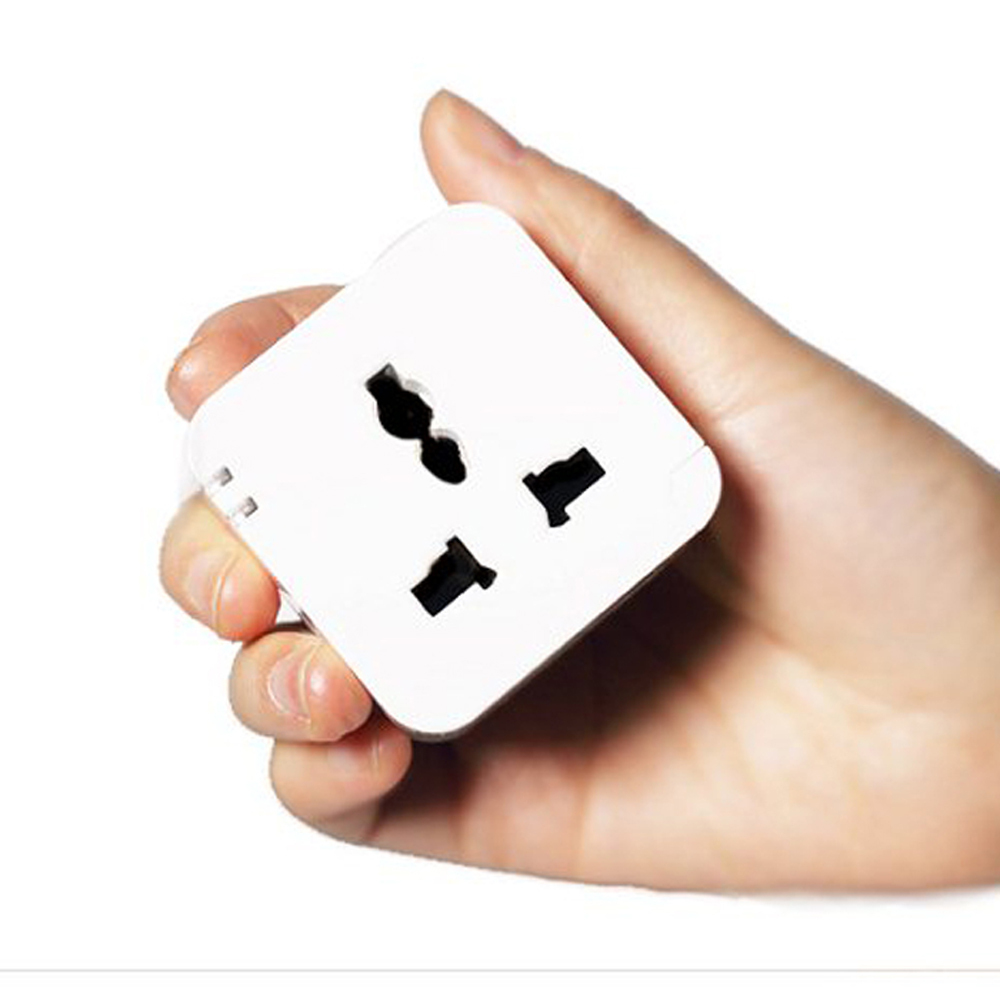
I found some nice WiFi outlets on the market a while ago - produced by Kankun. kankun-wifi-smart-plug-socket-outlet-220v-eu-au-uk-kankun-small-k1-electrical-socket-to.jpg

Only disadvantage was that they come with US sockets - so EU adapter was needed. 

See more details here: http://www.anites.com/2015/01/hacking-kankun-smart-wifi-plug.html

Unit runs a simple stripped down linux. Here is the script which I installed on every unit after I was able to log in

https://github.com/kooiot/kankun

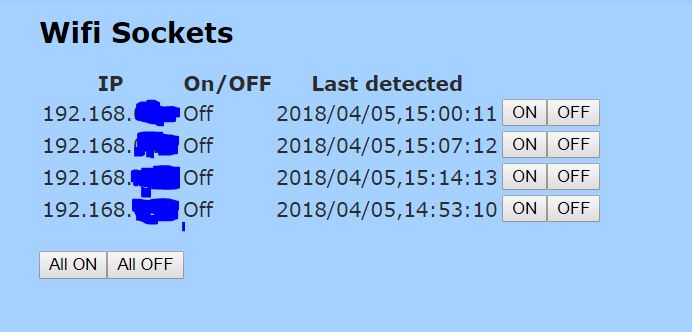
So now I am able to swich on-off them with simple http calls:

Example:

http://1.1.1.1/cgi-bin/relay.cgi?on

more later-----

wifisocket.JPG


The combined static/dynamic webpage response

...so how to have a combined, yet efficient webpage response to a request, which has static and dynamic content as well. 

So, the server webpages are created with the same logic as a PHP server would work.

It is based on the Arduino webserver, just modified the Webserver Example

A webserver static page (cropped) example from the SD card, example.htm

<!DOCTYPE HTML PUBLIC "-//W3C//DTD HTML 4.01 Transitional//EN">
<html>
<head>

<meta http-equiv="Content-Type" content="text/html; charset=UTF-8">
<meta name="viewport" content="width=device-width, initial-scale=2">

<title>Content1</title>

<style type="text/css">

.....

....

</script>
</head>
<body>

<h1>Ram</h1>
<div id="responseWin"> </div><br/>
$$$MYFREERAM$$$
<br/>
<input id="clickMe" type="button" value="Test 7" onclick="ajaxCaller(7);" />

</body>
</html>


It has a special token part, starting and ending with $$$.

So when the webserver founds a "token" while serving a static page from the SD card, it simply calls the appropiate function and sends the dynamit part of the webpage. After that it sends the remaining static part from the SD card..

memset(&tBuf,0,sizeof(tBuf));
clientCount = myFile.read(tBuf,63);
//check for token content $$$TOKEN$$$.
char* pch = strstr_P(tBuf,PSTR("$$$")); //first occurence
if (pch)
{
//found one occurence
char* pch2 = strstr_P(pch+3,PSTR("$$$")); //closing occurence
if (pch2!=NULL)
{

#ifdef ServerDEBUG
Serial.print(F("WebToken found:"));
#endif
strncpy(commandCodeText, pch+3, pch2-pch-3);
#ifdef ServerDEBUG
Serial.println(commandCodeText);
#endif
char SecBuf[65];
char ThrBuf[65];
memset(&SecBuf,0,sizeof(SecBuf));
strncpy(SecBuf,tBuf,pch-tBuf);
memset(&ThrBuf,0,sizeof(ThrBuf));
strcpy(ThrBuf,pch2+3);
client.write(SecBuf);
//executing conditional command
webTokeniser(client, commandCodeText);
client.write(ThrBuf);
clientCount = 0;

}

................

bool webTokeniser(EthernetClient thisClient, char recvcommandCodeText[])
{

if (strstr_P(recvcommandCodeText,PSTR("MYFREERAM")))
{

strcpy_P(tBuf,PSTR("<!--FREERAM TOKEN-->RAM:"));
thisClient.write(tBuf);
#ifdef ServerDEBUG
Serial.println(F("FREERAM TOKEN MODE"));
#endif
int currRam=freeRam();
//writing uptime too.
char upTimeStr[7];//="33d,23h";//uptime:33d,23h
getUpTime(upTimeStr);
sprintf (tBuf, "%d(%d)/8192, uptime:", currRam, minRam);
thisClient.write(tBuf);
thisClient.print(upTimeStr);
return true;
}

.......................

}

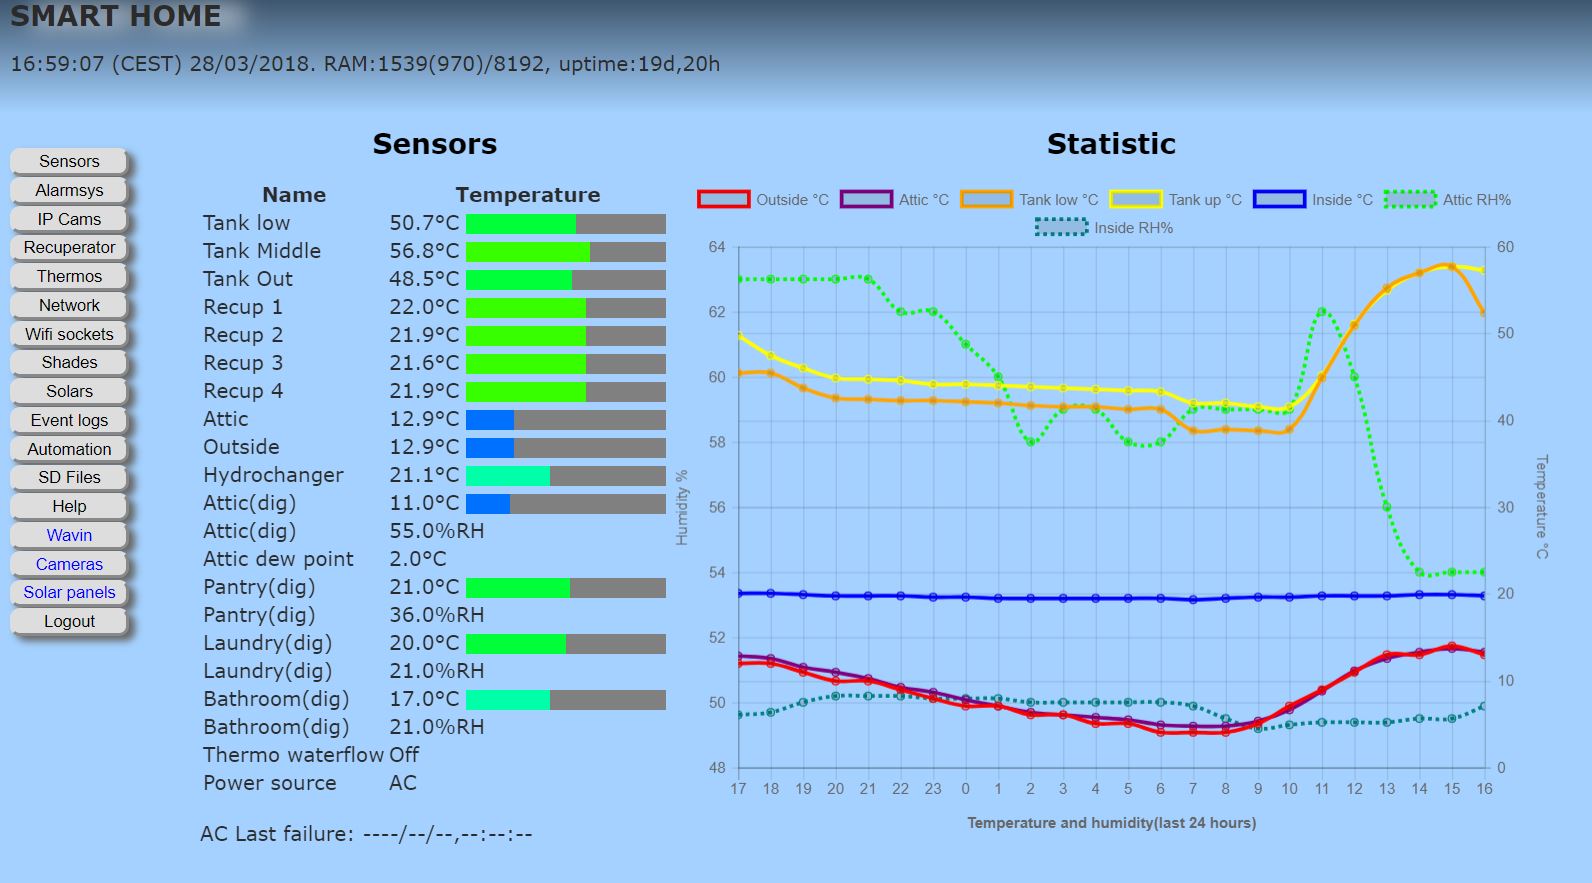
This was sent to the browser (cropped) as a response - the token part was discarded of course.

...........

</style>

</head>
<body>

<h1>SMART HOME</h1>
13:42:20 (CEST) 03/04/2018. RAM:1539(970)/8192, uptime:25d,17h
<span name="responseWin" id="responseWin" style="color:green;font-weight:bold"></span>

<!--

 .......................

and so on....have fun...


Move smarthome to the cloud

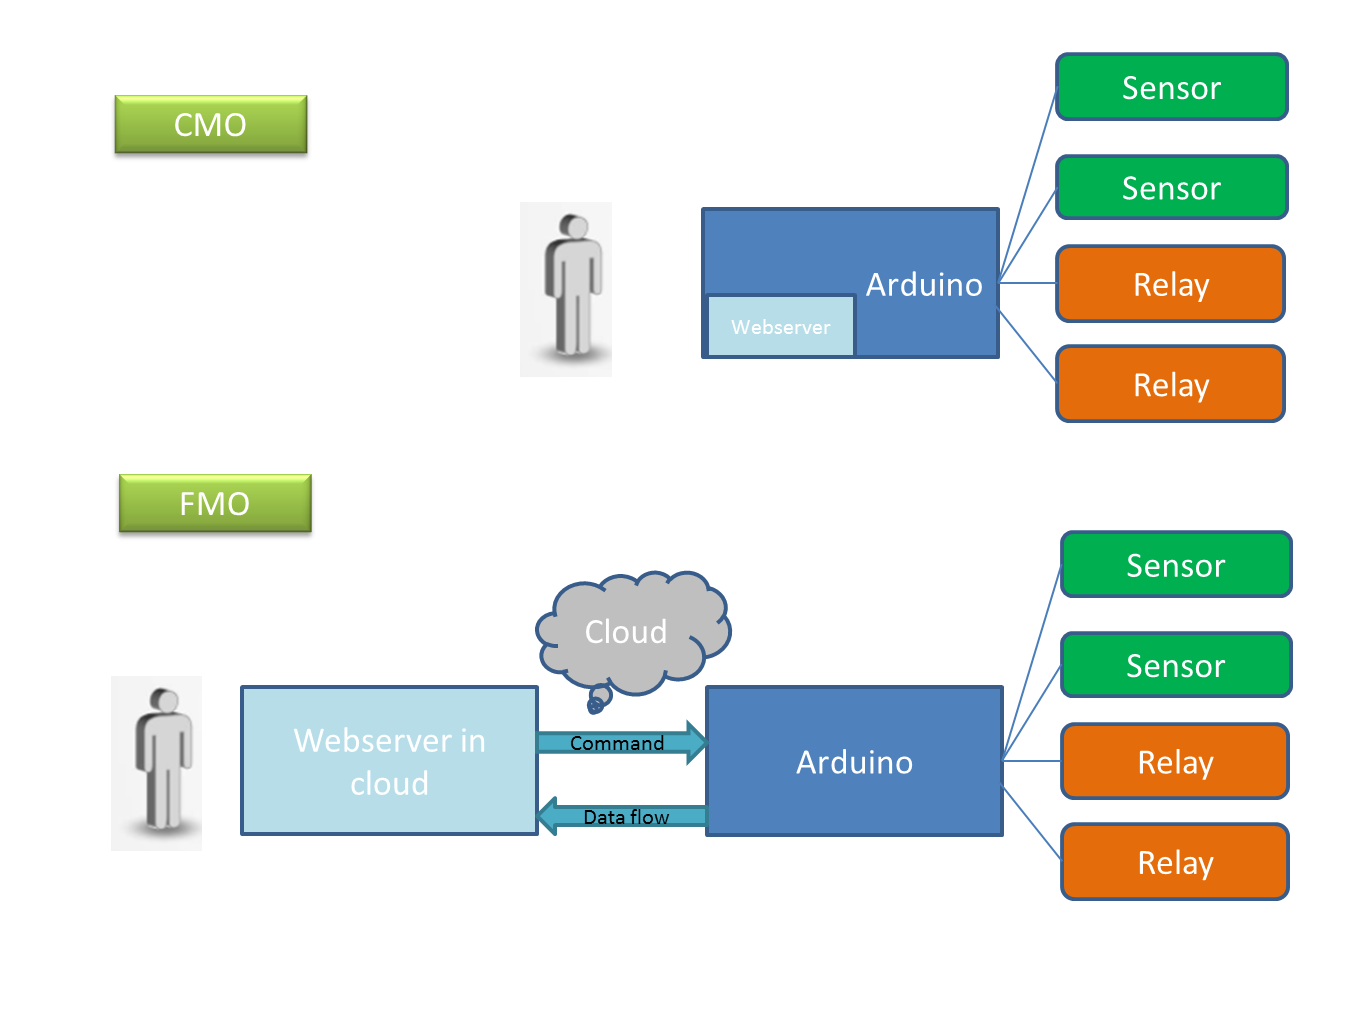
I made some brainstorming in the morning....what about moving the web service part of my smart home to the cloud?


smarthome_move_to_cloud.png

The arduino has a webserver, but it is very-very limited. Can handle only 4 network sockets, and the has no real multitasking capability (I overcomed these limitations, but Arduino was simply not designed for that). The "built" in webserver will still be there, as backup access.

This is just a quick brainstorming, but in the future I think I will realize it. I played a bit with Amazon and Google cloud services, and liked what I saw.

What is your opinion?


Wavin thermosystem - the ModBus TCP industrial connection with arduino

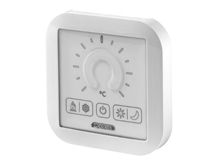
wtccontrol.jpg(draft article)

We have a nice thermal management system already at home. It was produced by Wavin

It controls every room separately, opening/closing all of the heating pipe valves (and can control the cooling in the summer too, which is really nice thing, believe me). 

Has a nice internet control option too if you have the WTC netbox module at home, (You may give a try with the demo user: http://www.mywavinhome.com/, user/password is wavintest / wavintest) 

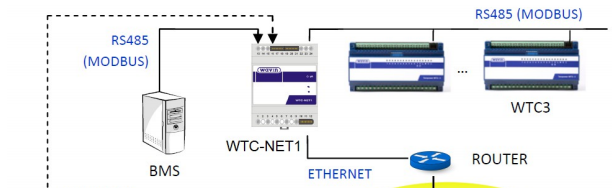
With or without the netbox module, the whole system communicates (and thus can be controlled) using ModBus commands. Modbus is a serial protocol which is widely used by building/industrial management, etc.

wtc_net.PNG


It has a TCP variant implementation too - and luckily, the WTC-NET1 module supports that mode. So I don't have to cable from arduino to WTCNET1 directly, just enough to setup a tcp/ip client connection to the module and send/receive the WTC1 commands.

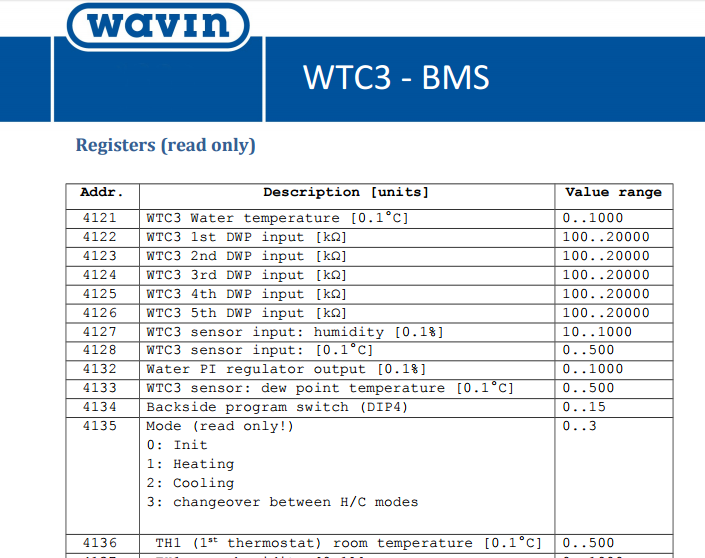
Some possible commands from the WTC1NET service manual:

wtc_modbus1.PNG

(Here is the whole service manual/full command list is interested)

Well, it sounds simple if you read this all together, getting the fact that it has errors (lot of analysis was required...). 

And the next thing that it is hard to find an arduino library for ModBus TCP.

I found one implementation here: http://myarduinoprojects.com/modbus.html but actually it was not working:

So, the first step was to fix the library....(I emailed the fixed version to the author to update on his webpage)

....then to get a good ModBus tester sofware to play and experience with the interface.

...then to intergrate this to Arduino:

thermos_display.png


(Article will be continued. And sorry for the typos, I am quit tired, that is the first draft of this entry. And this is just a hobby :) )


süti beállítások módosítása